“How I Shot And Edited It – Stars, Storm and Basecamp, Nepal” plus 1 more: Digital Photography School |  |

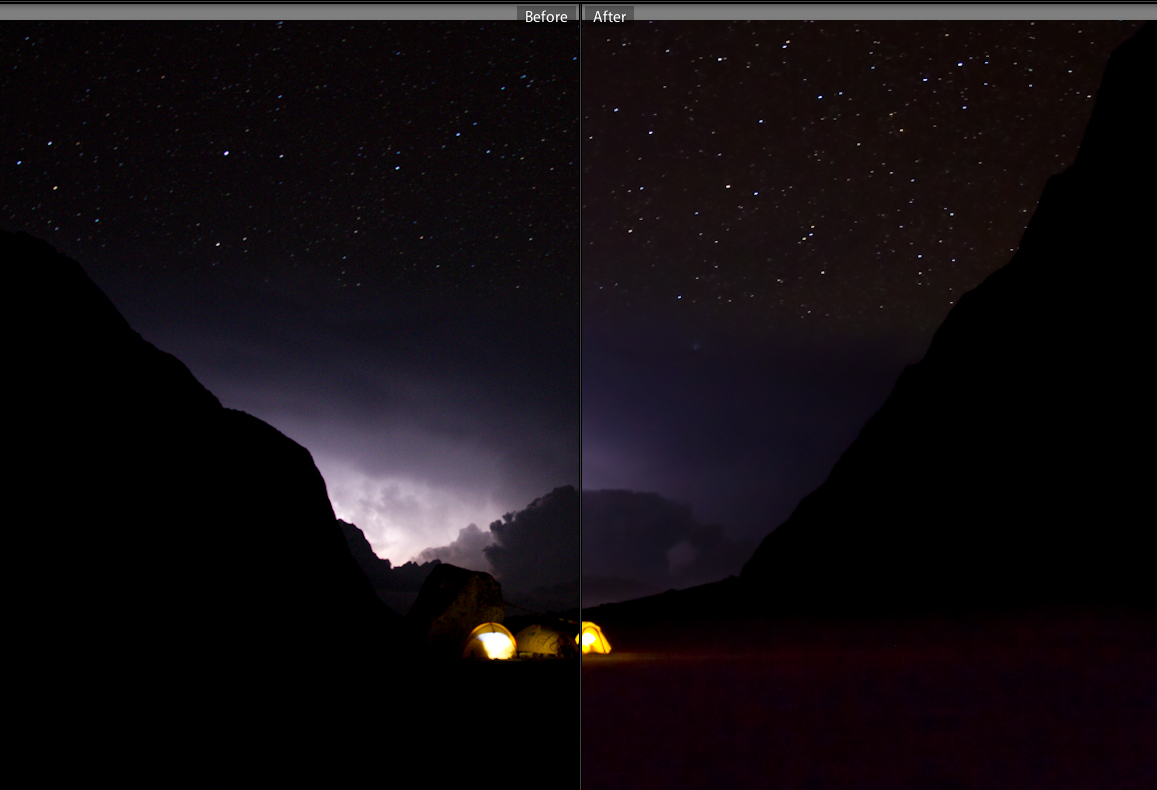
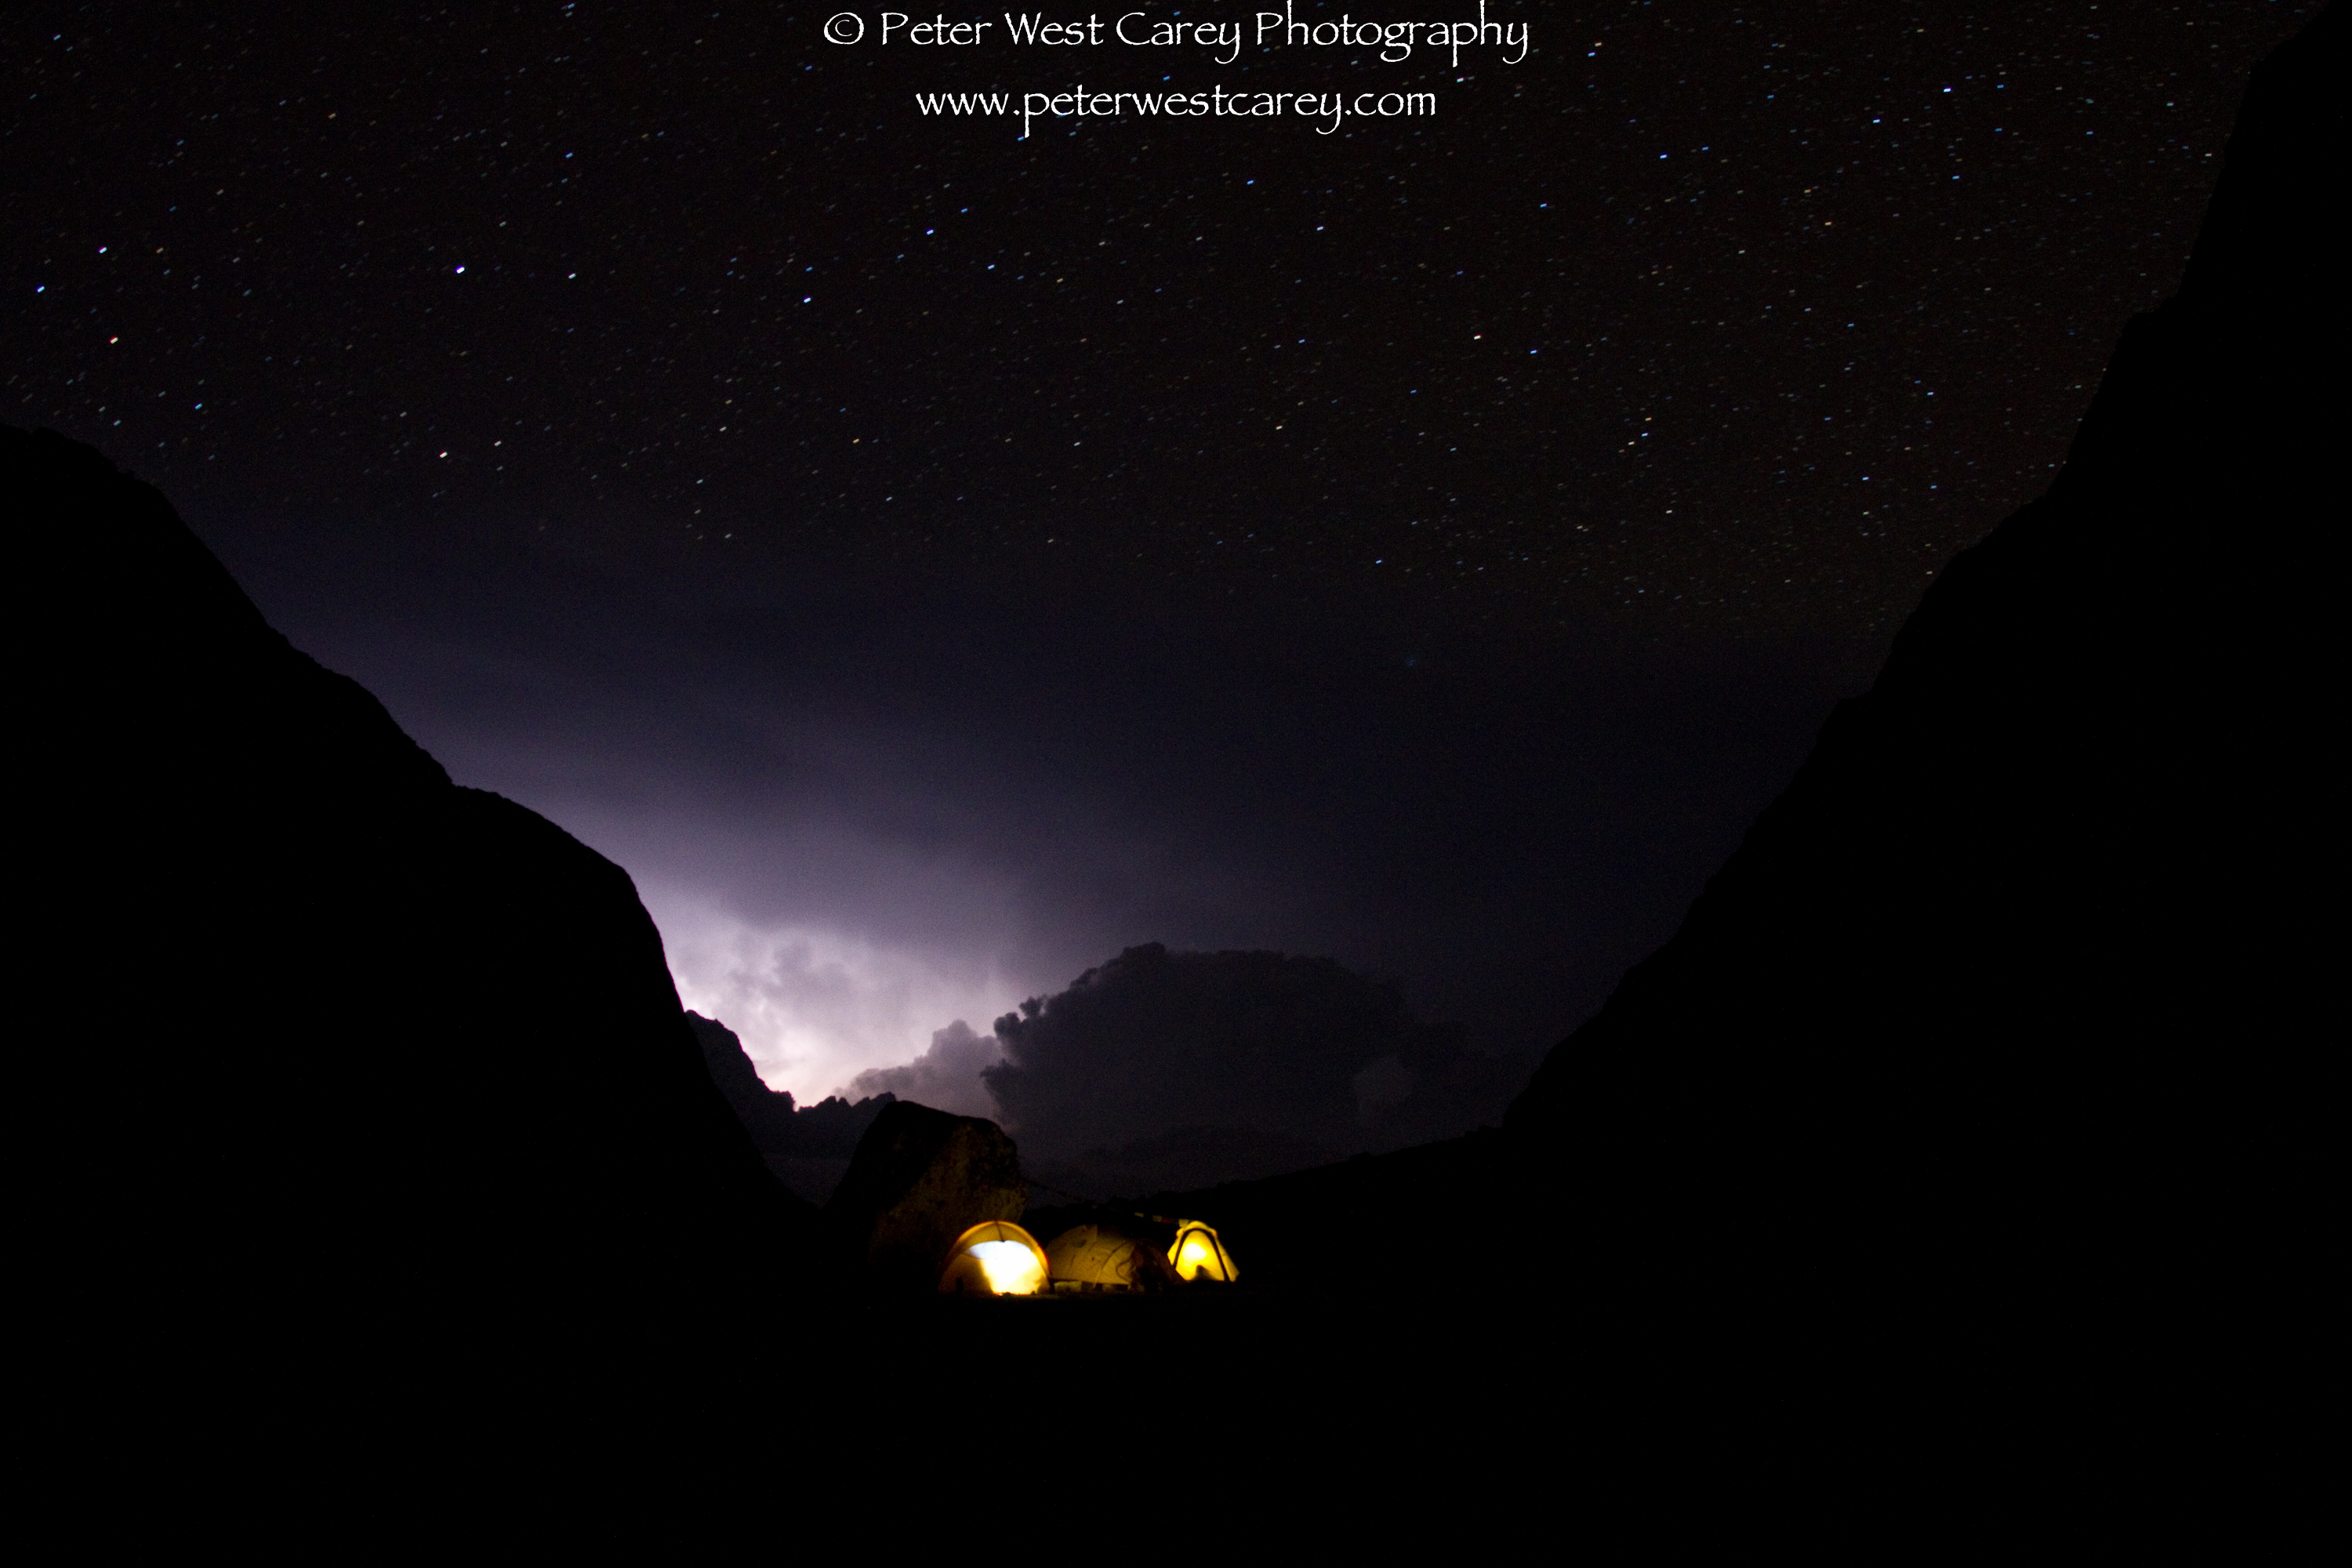
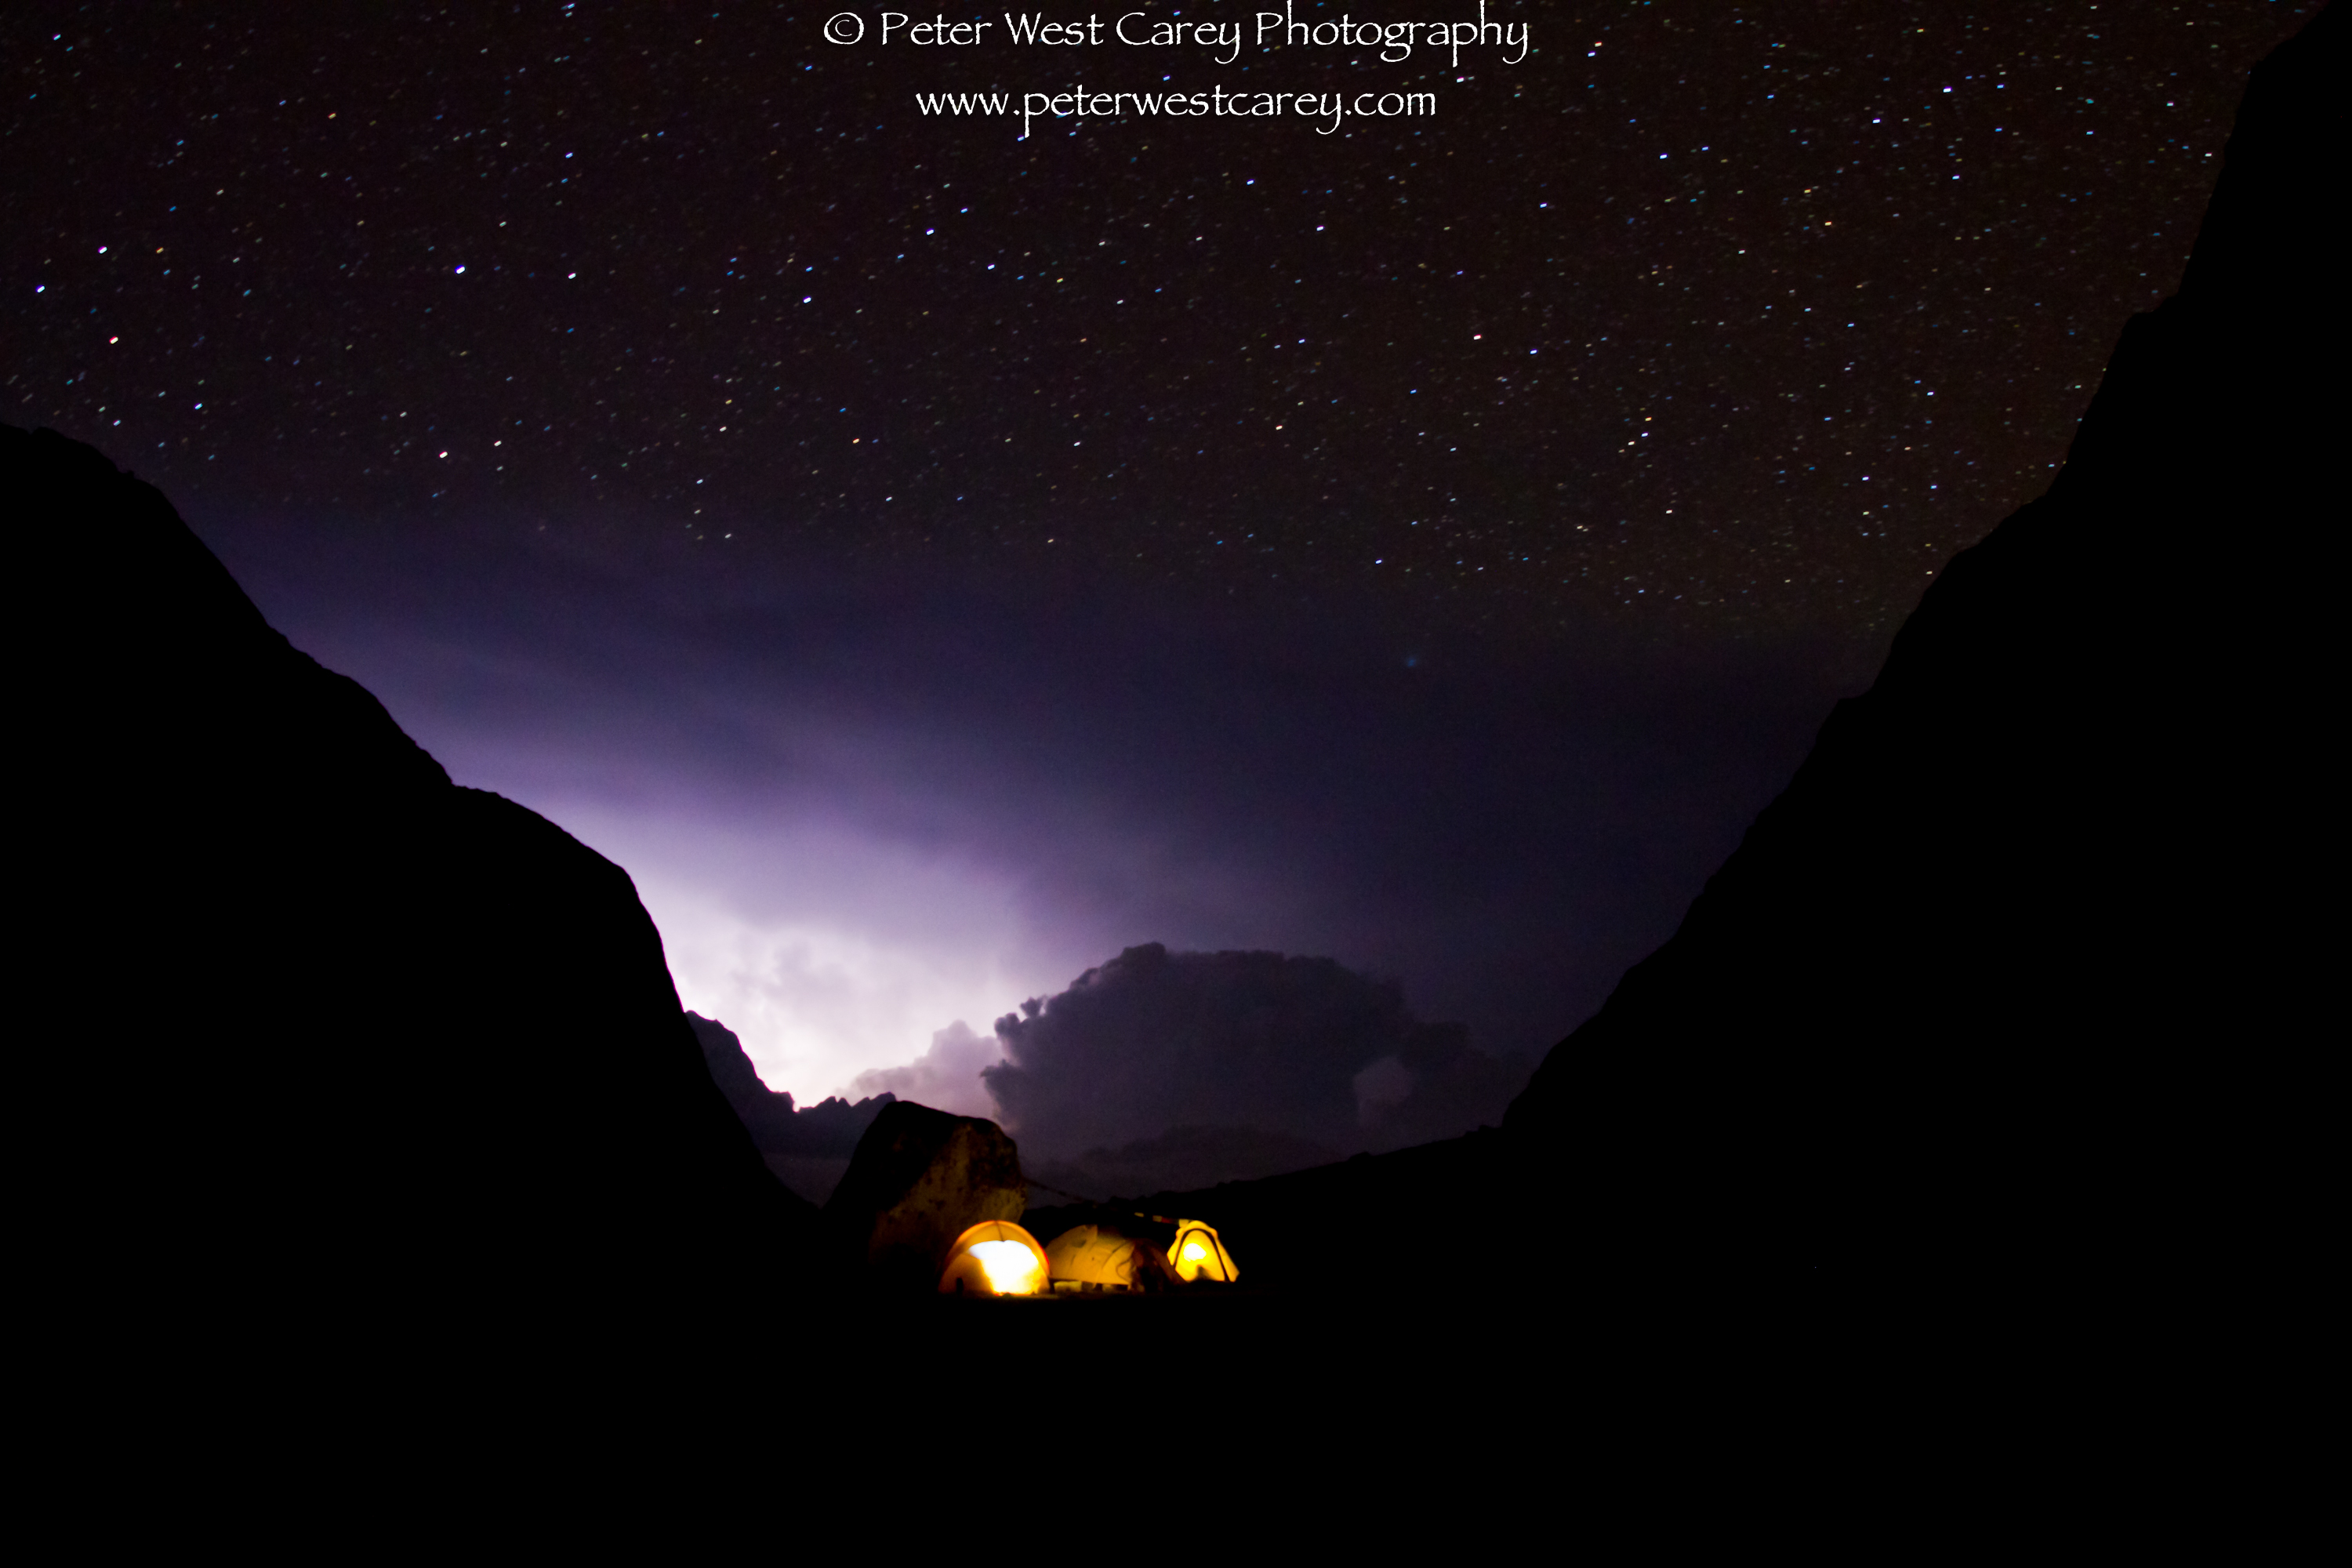
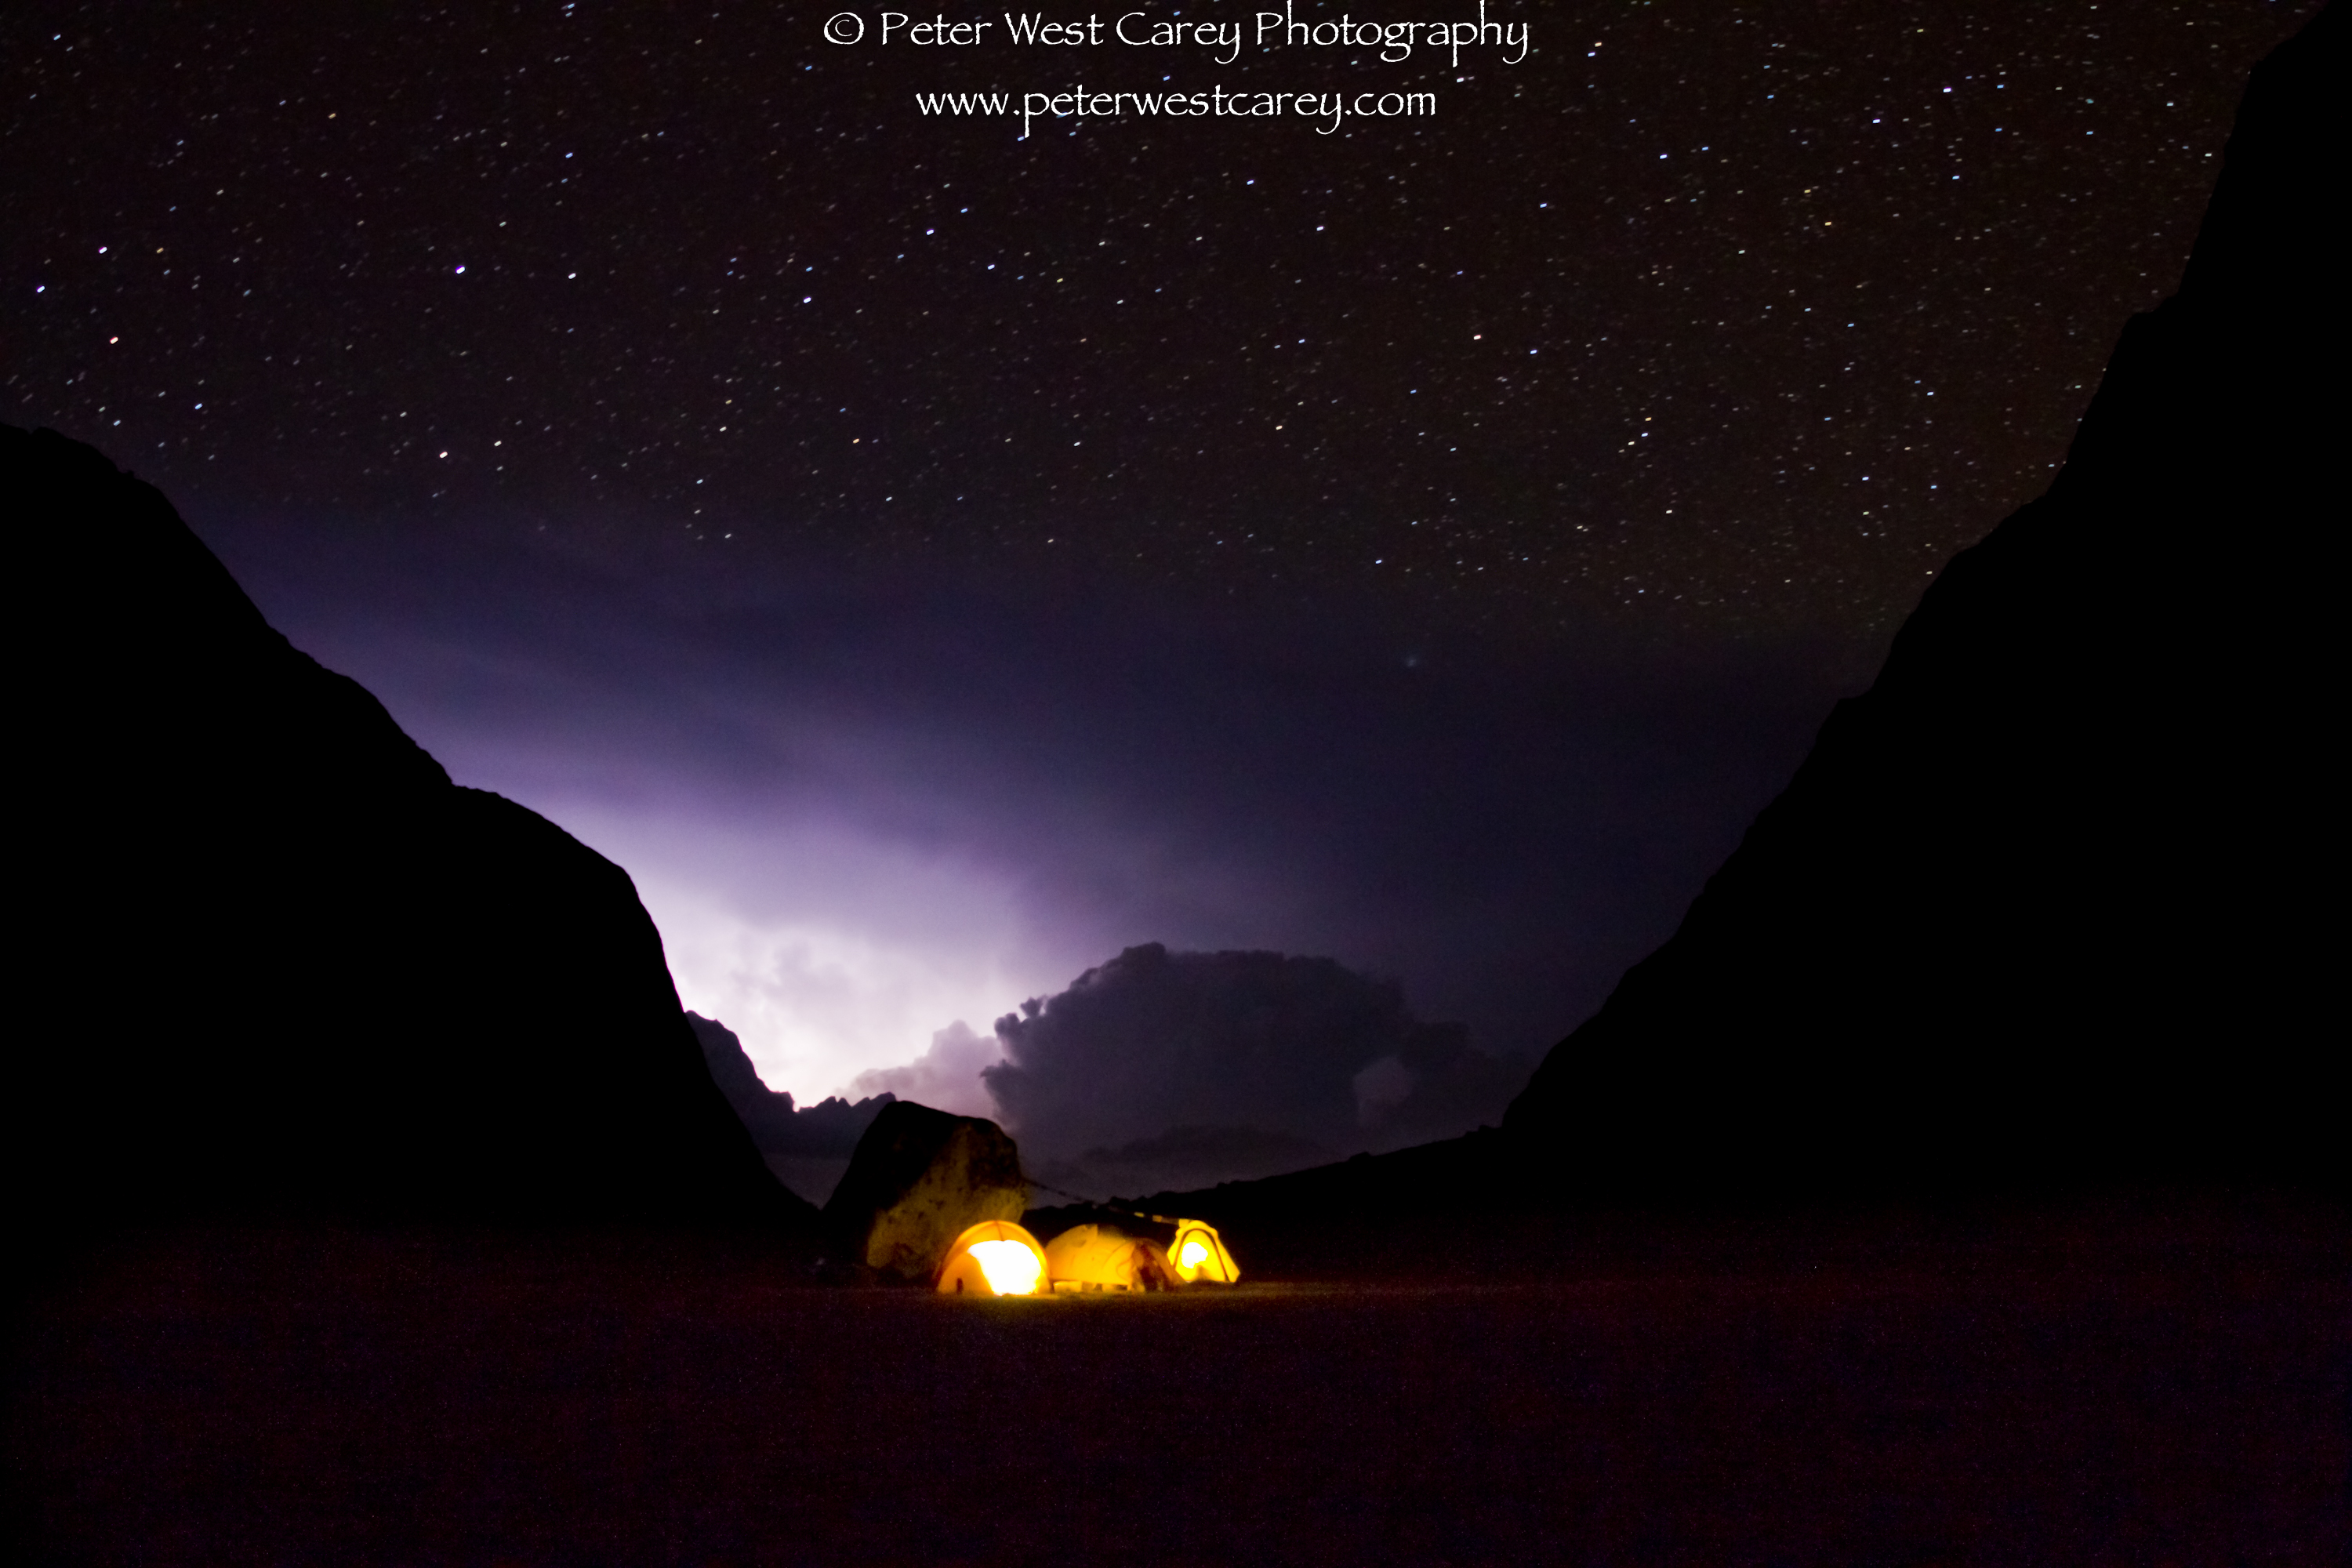
| How I Shot And Edited It – Stars, Storm and Basecamp, Nepal Posted: 30 Jan 2011 10:48 AM PST I typically don’t edit my shots heavily, yet one that I brought back from Nepal demanded some help and was eye catching enough by itself to warrant an attempt. My hope is in walking through these steps, you might glean a an idea or two on a similar shot if you really like night photography. Click on any images in this post to see a 3000px wide rendition for higher detail not possible in the 600px representation. Starting with the original: This shot was taken at the basecamp for a climb of a remote peak in Nepal known as Kyajo Ri. Basecamp is situated in a gorgeous 1.5 mile long hanging valley, a valley that has a steep drop off at its terminus. This photo is looking down valley and is shot at an altitude of aproximately 14,800′ (4,500m). It is shot with a Canon 7D and a Canon EF 28-300mm L lens at 28mm, ISO 1600, 30 seconds and f/3.5. I set the camera on a rock as I was without a tripod at this point. To start with, this isn’t that bad of a photo. The clouds are fairly well exposed and you can see the tents, lit up by my two partners. An electrical storm was brewing and I have many, many shots that did not come out while I waited for lightning strikes in the clouds. 30 seconds was about as long as I wanted to go so as to not streak the stars too much. I also wanted to give some sense of place and that is lost in the fact that the valley wall on the right is missing. All the edits were made in Adobe Photoshop Lightroom, my preferred photo editor. The first steps where to remove some of the noise I know exists at ISO 1600 and brighten things up a bit. While this image was shot at +0 for Exposure Compensation, it is dark around the edges because of the brightness of the lightning and tents. I moved the Noise Reduction Luminance slider to +38 and Exposure to +1.35.
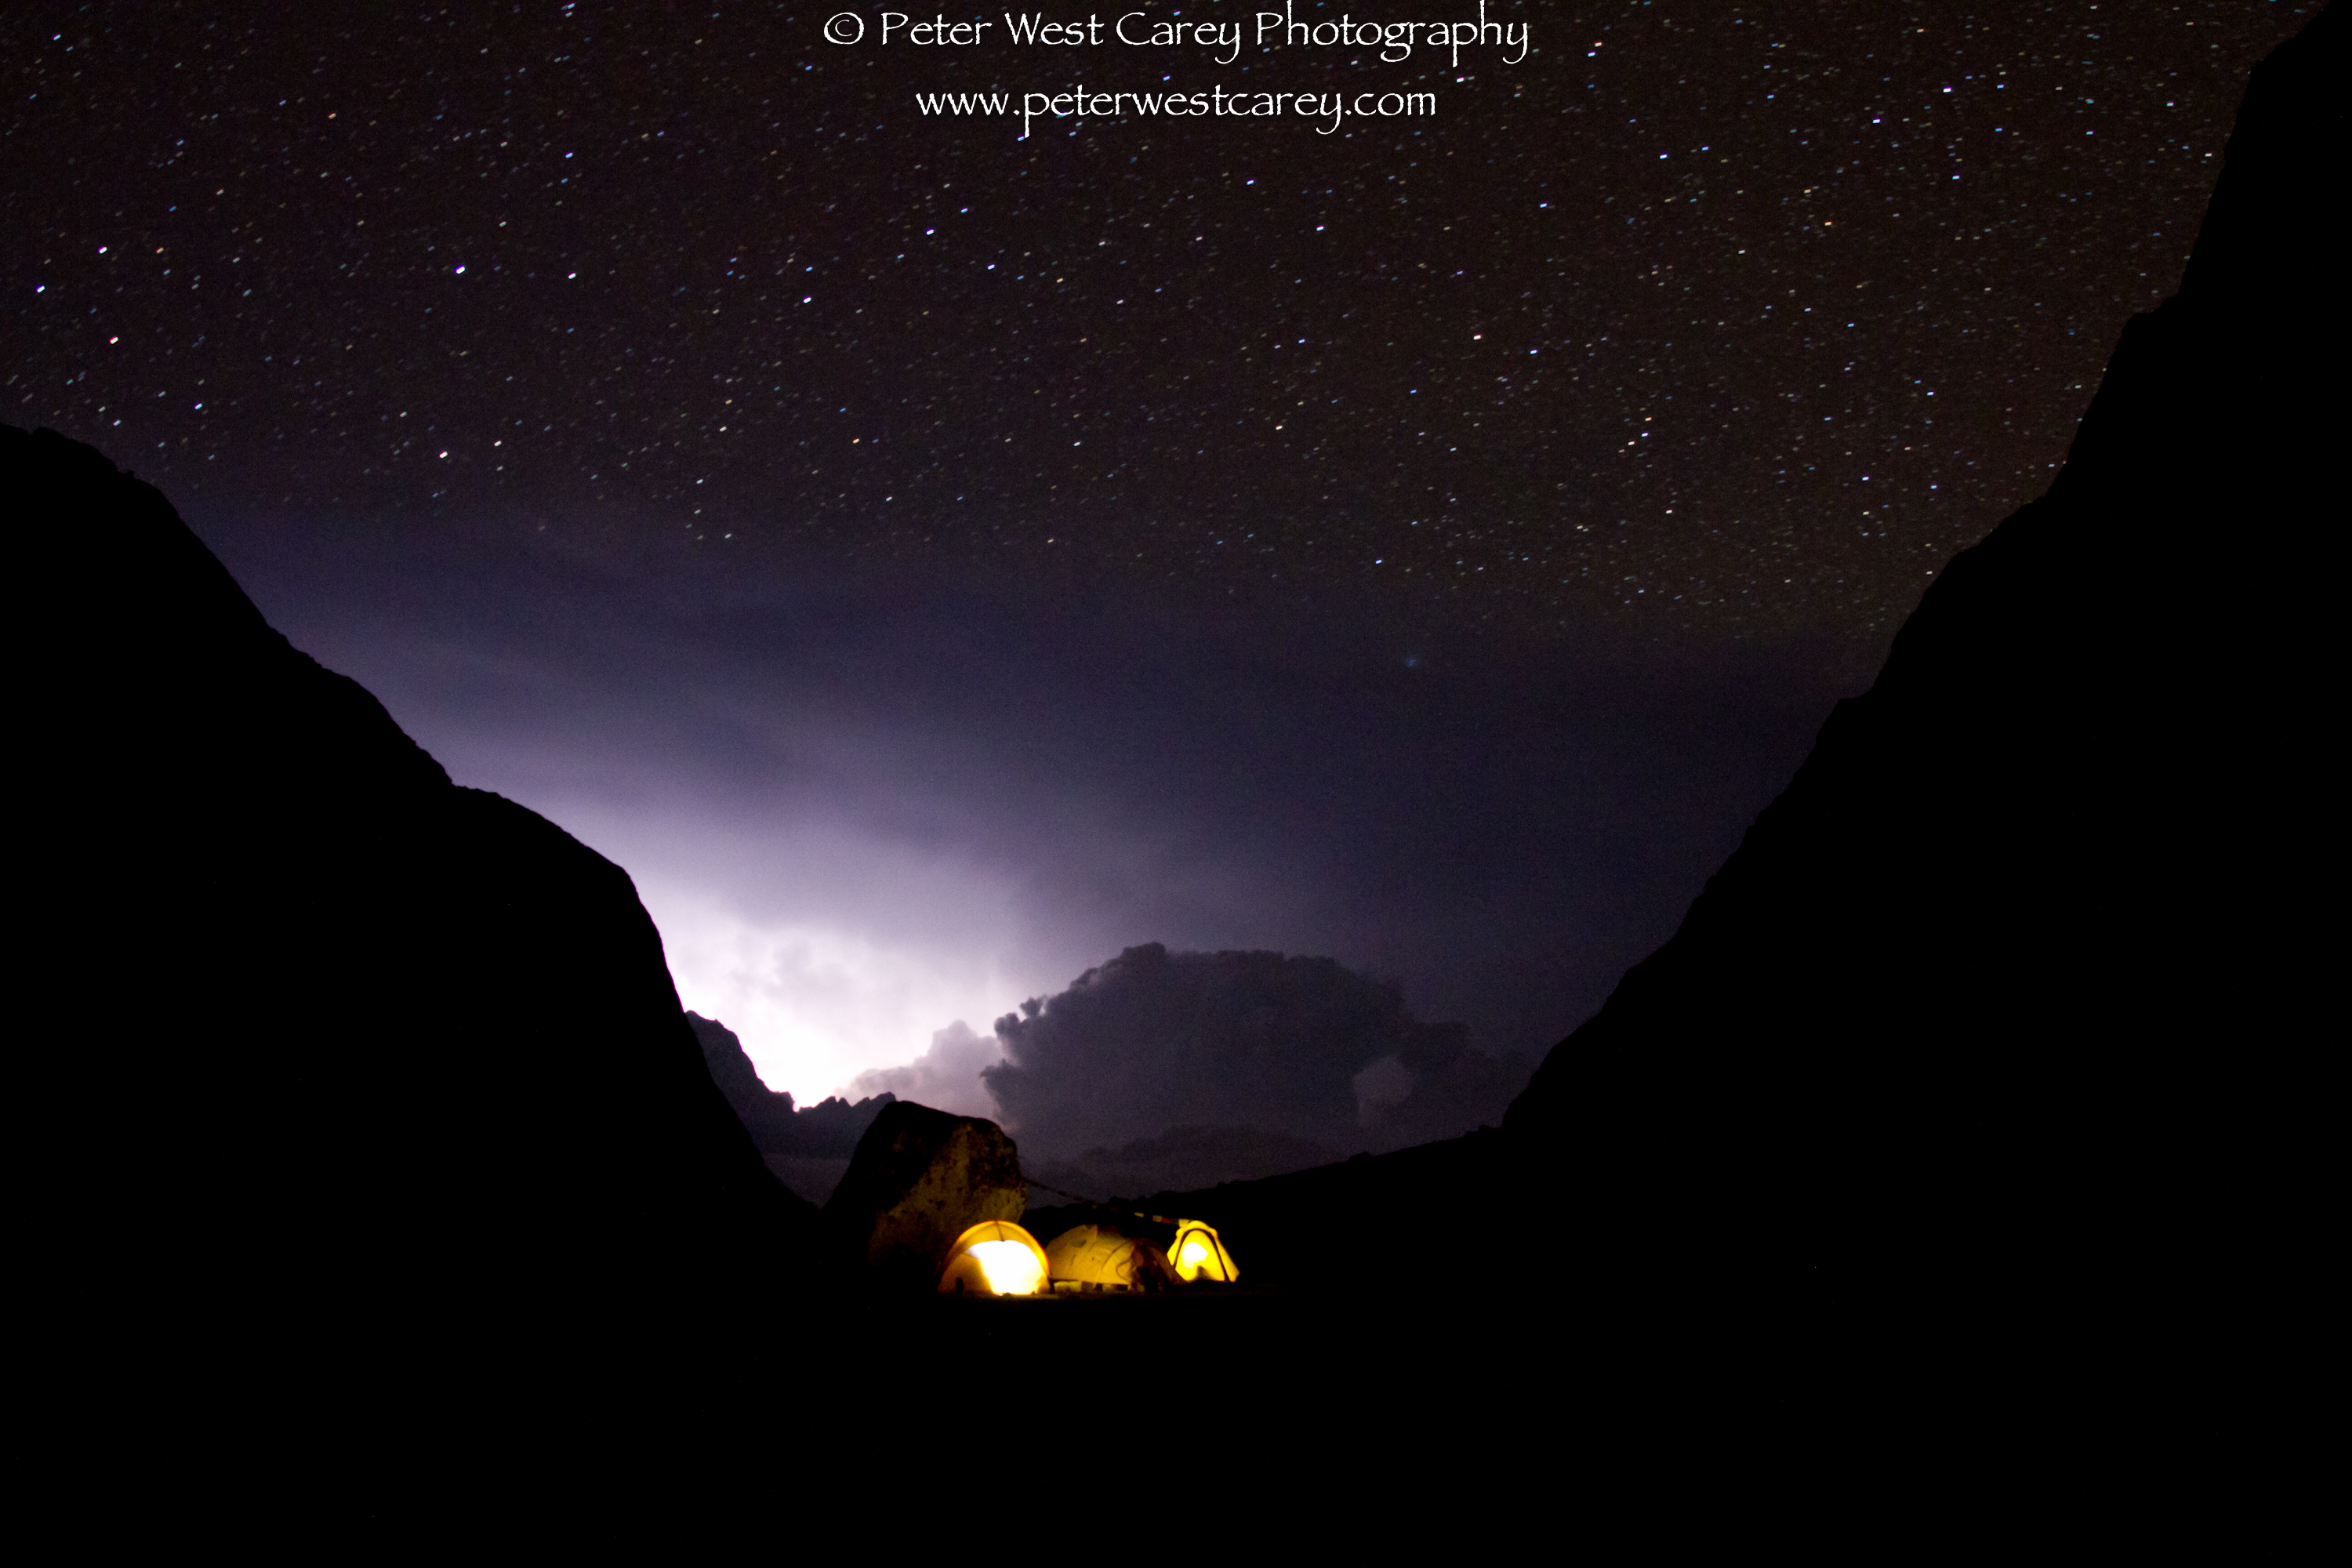
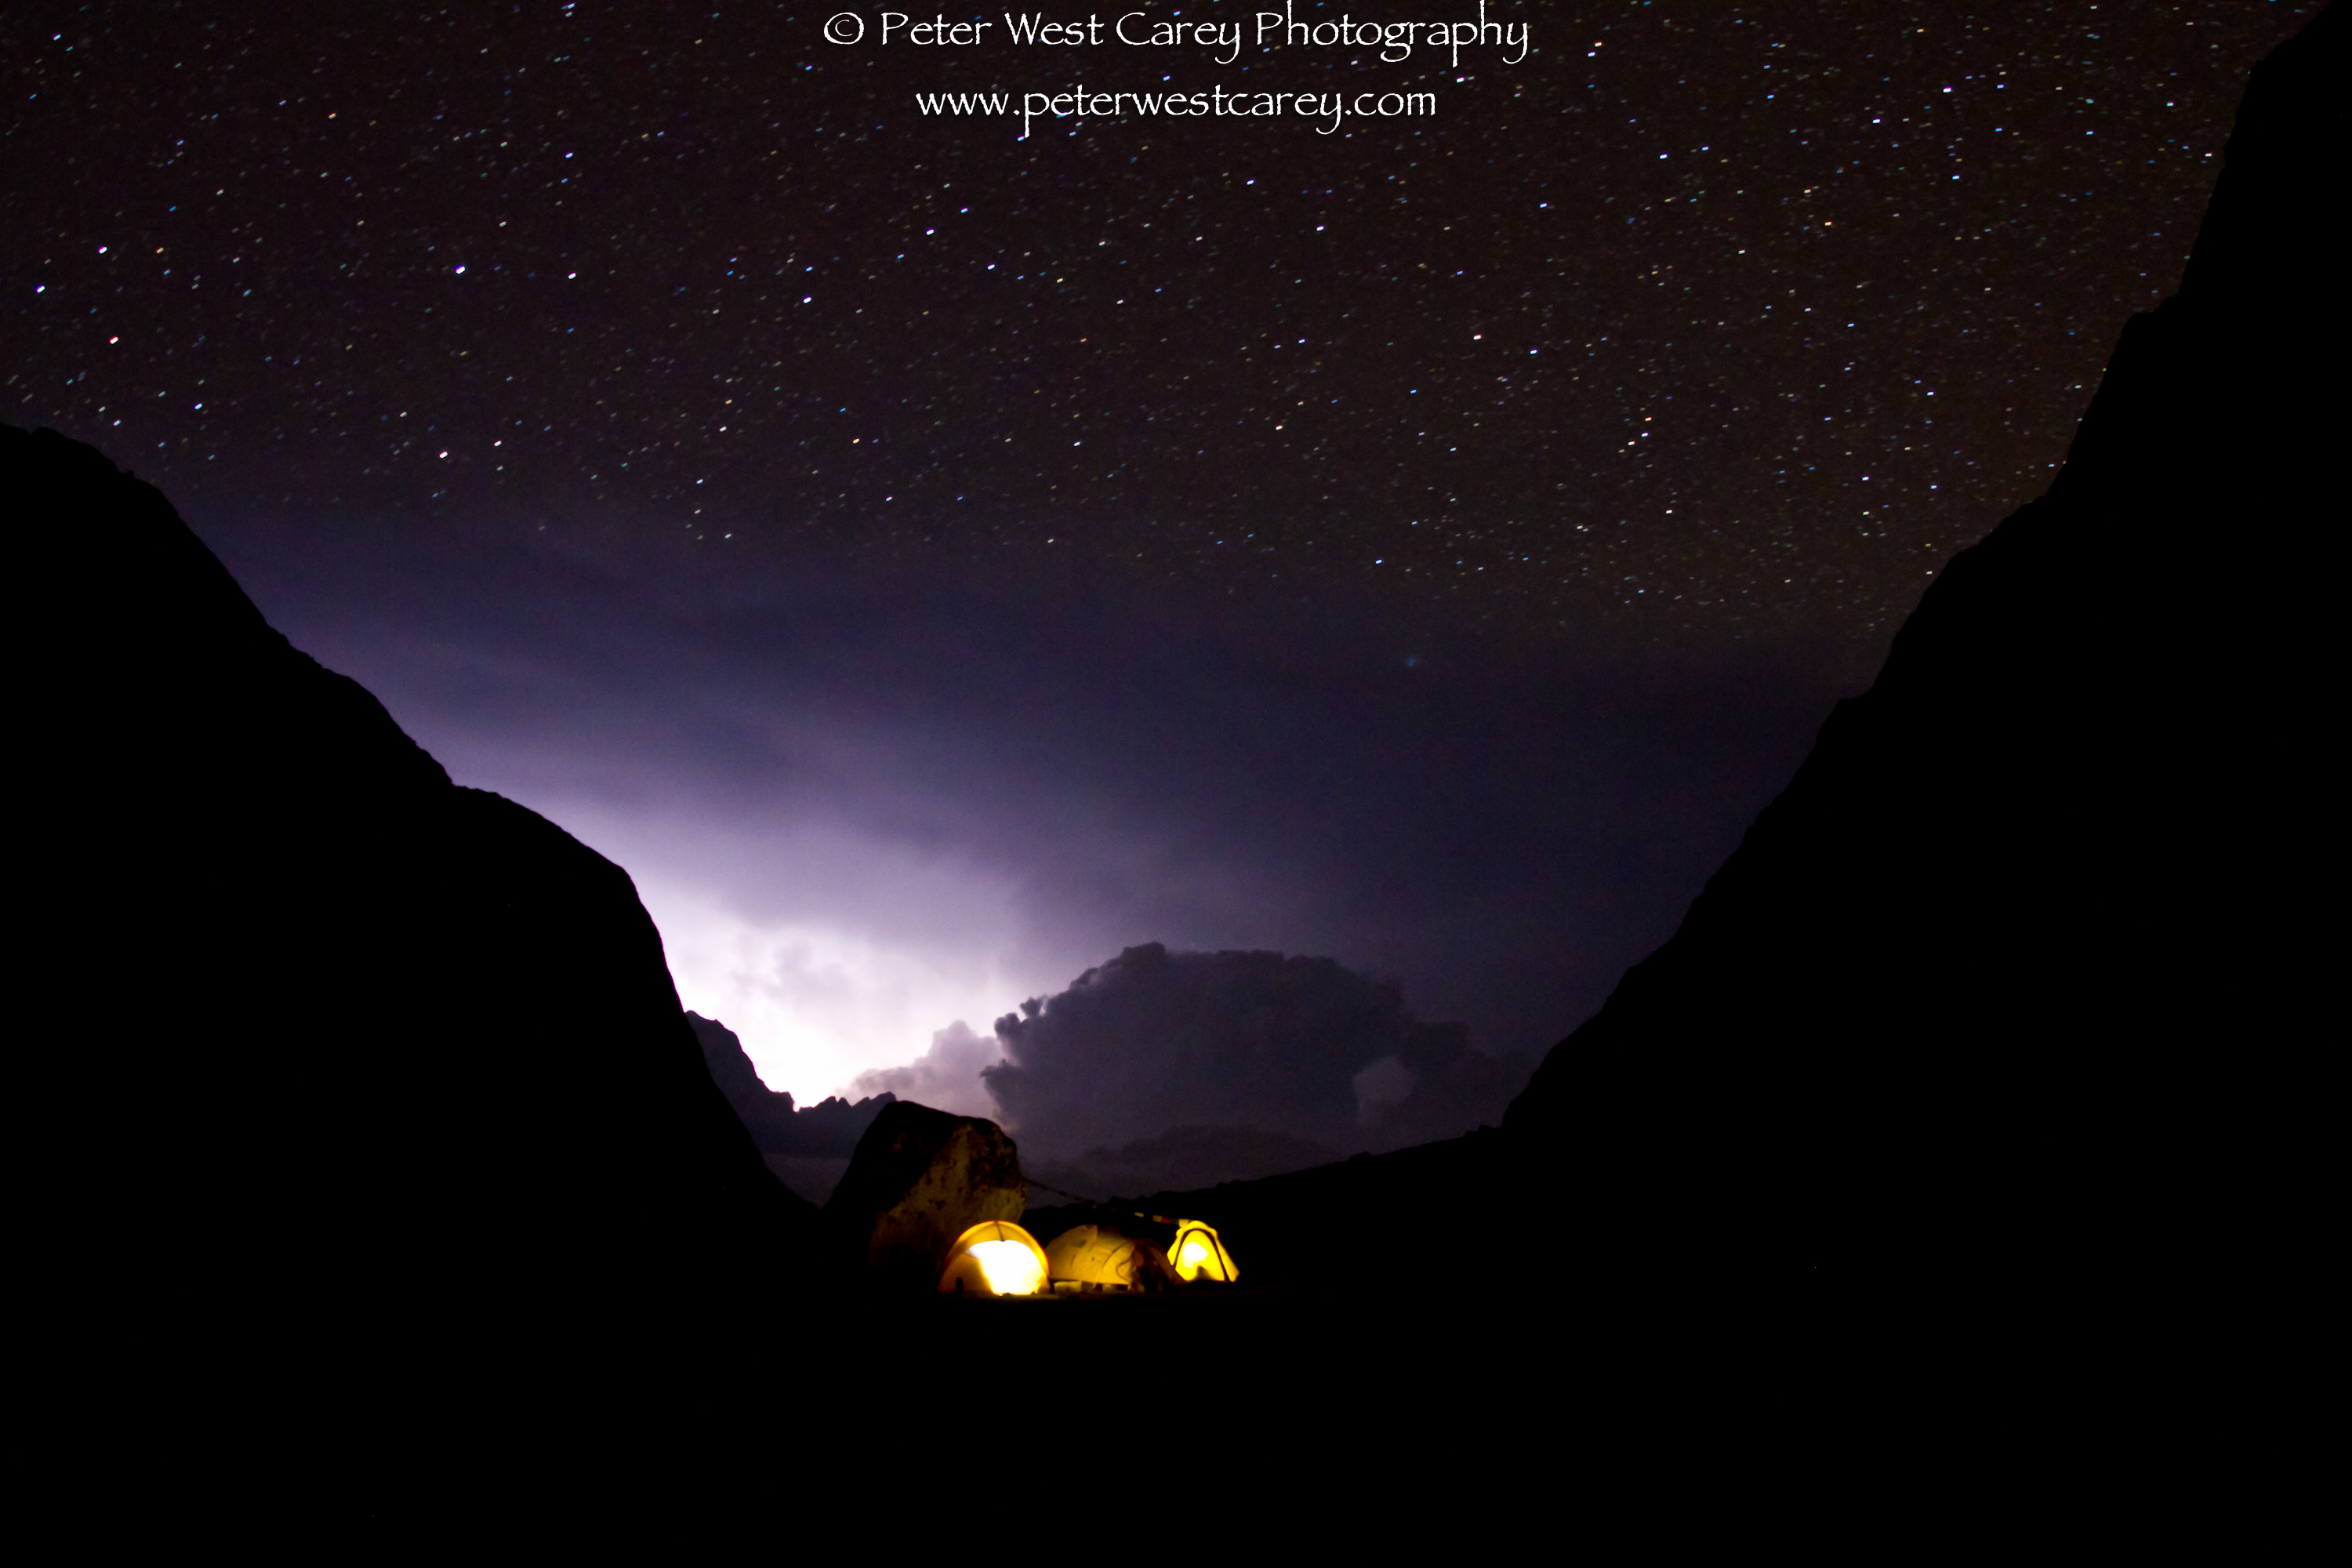
Used the Highlight Recovery to help bring back some of the overblown clouds, but not much, bumping it up to +75. Saturation was given a slight increase to +18 and Contrast was moved to +45 which helped define the clouds more as well as the tents. I still didn’t like that the tents weren’t grounded. There was no real perspective to them. What were they standing on? We’re they just floating in space? To fix this I used the Adjustment Brush with at setting of Exposure +2.40. I then painted in the foreground as seen in the image below. That rendered just a bit of the spilled light from the tent cast out on the ground in front of them. In doing this, I also moved the Noise Reduction Color slider to +97 to remove just a small bit of red fringe on the tents. This is the final image as I enjoy it. It can use some final small tweaks here and there, but I don’t like spending a lot of time in front of the computer with those minor edits. This, to me, gives a feeling of place for the tents but also shows the majesty of the clouds coupled with the limitlessness of Space. Post from: Digital Photography School
    |
| 4 Concepts for Collages, Diptychs, Album Pages, etc. Posted: 30 Jan 2011 05:06 AM PST When you assemble a book template, diptych, triptych or collage in Photoshop (or other editing software), do you arrange them so they work together or do you just pop them in? In this post, I want to talk about the things to consider when assembling an attractive collection of images that can work together nicely. {Colours}You can compile images into a collage that aren’t necessarily from the same session or of the same topic. They can complement one another through the use of color schemes or even be edited to look similar even if they’re strikingly different for a quirky feel. The image below is taken from a vol25 album template with photography by Jen Johner. The images are so different yet work beautifully together in this collage: {Looking inward}I always make sure that my album pages and collages are compiled with the images looking inward. For the viewer, it can be very uncomfortable to see an album page where the subject is looking in a direction that falls off the edge of the page. For example, see the triptych below and you may agree that the boy’s gaze which goes outside of the collage (the right image) doesn’t feel right. He’s not engaged with the other images. At times, I will mirror images in Photoshop by selecting “edit > transform > flip horizontal” to keep all the images engaged with the center of the collage. {Leaning}
Much like the example above, I love to use images that lean into one another. This gives the sense that they are engaging with one another and just small parts of the ‘big picture’ as it were. I love the example below where every image seems to be (ever so slightly) engaging with the other through body language: {Progress}I particularly love using Diptychs to communicate progression or movement. Especially when they are created using images that wouldn’t make much sense if viewed alone (as in the first example below). In the second, combining the two images gives the viewer the sense that the subject is walking towards them. As you can tell, I love combining images. But I also know when to display my strongest work alone as as not to crowd the image. Experiment with different methods for displaying images together to tell a story or convey an idea. You might just get hooked too! Post from: Digital Photography School
  |


| You are subscribed to email updates from Digital Photography School To stop receiving these emails, you may unsubscribe now. | Email delivery powered by Google |
| Google Inc., 20 West Kinzie, Chicago IL USA 60610 | |